Subscription Widget
Overview
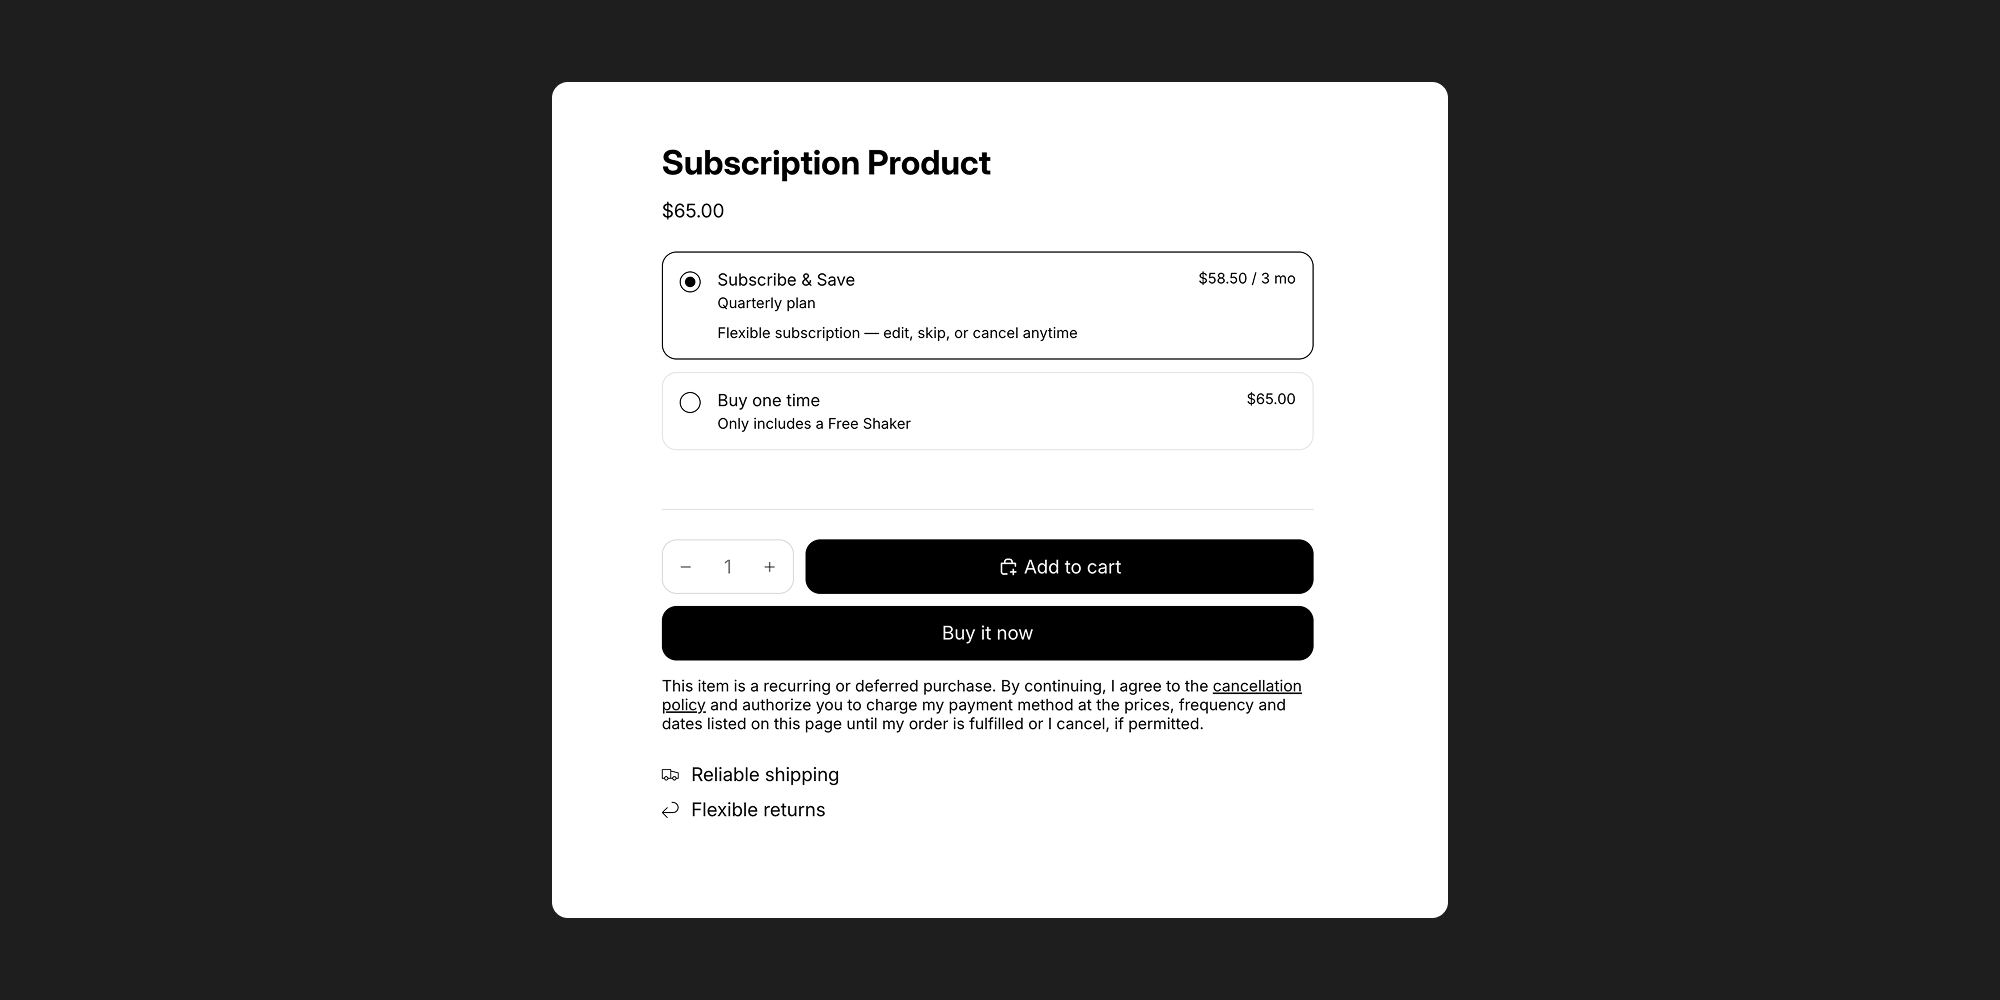
The subscription widget block allows users to view and select a product’s selling plan.
Selling Plans
About selling plans
Selling plans represent how products can be sold and purchased. For example, a product can be configured to enable it to be billed and delivered on a monthly basis at a 15% discount. Two common selling plan types include the "Subscribe and save" and "Prepaid" options. "Subscribe and save", also known as "pay per delivery", is a selling method where a customer pays for goods or services per delivery. "Prepaid" is a selling method where a customer makes a single payment upfront.
Creating and modifying selling plans
To create, update, or remove a selling plan from a product, you must use a subscription app from the Shopify App Store. This Expansion Block works with any app that creates selling plans.
Adding the subscription widget to your theme
Once a selling plan is created, navigate to your theme and add the subscription app block to your product page or a featured product section. If a selling plan has been assigned correctly to a product, the subscription widget will render all selling plans including one-time purchases.

Assigning the product
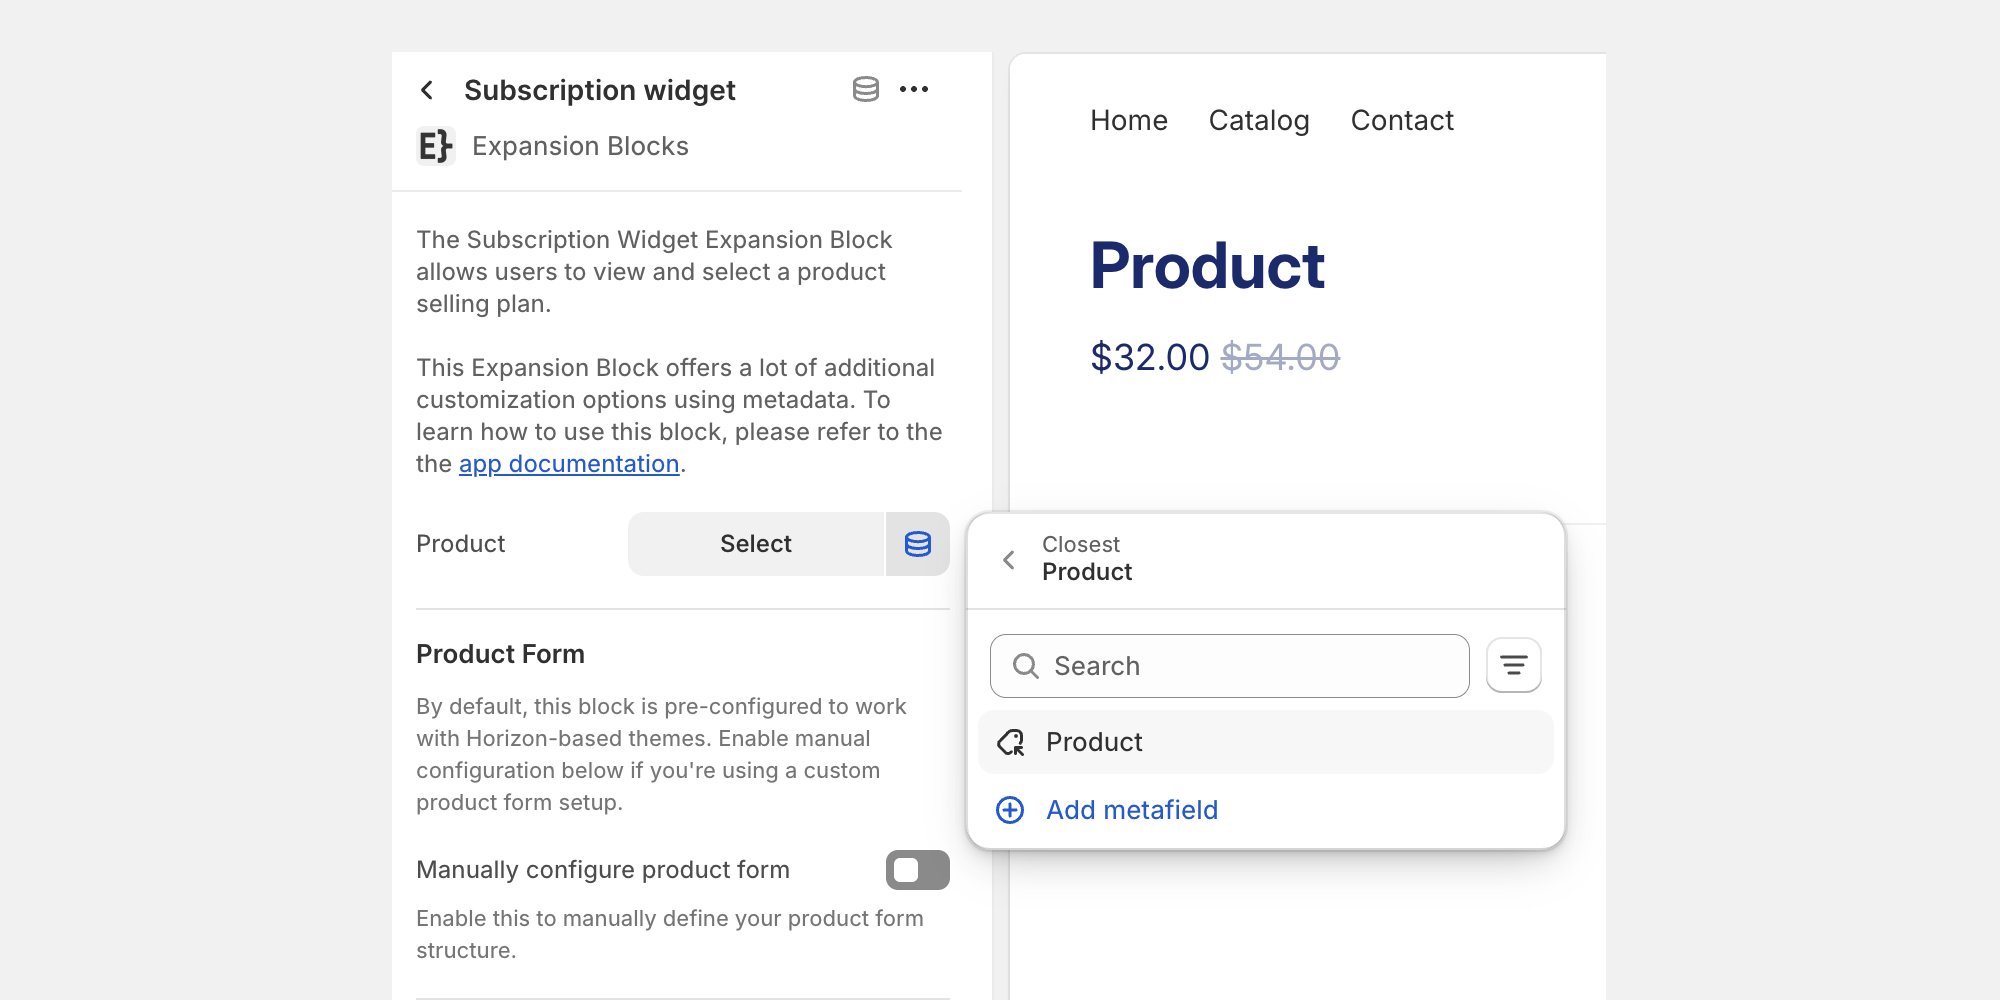
After the subscription app block is added to your theme, you'll need to assign the (closest) product in the app block settings by selecting the the metafield icon.
Widget Customization
Out of the box, default styles and layouts are applied to the subscription widget. You have the option to style the widget further by adjusting theme settings in Dawn, changing CSS variables, or creating metaobjects.
Metaobject Setup
To gain control over naming conventions, layout, and messaging in the widget, you’ll need to create metaobjects. After the metaobject is set, you can create an entry for each subscription plan to change the language and configuration of each selling plan option.
Steps to configure the metaobject:
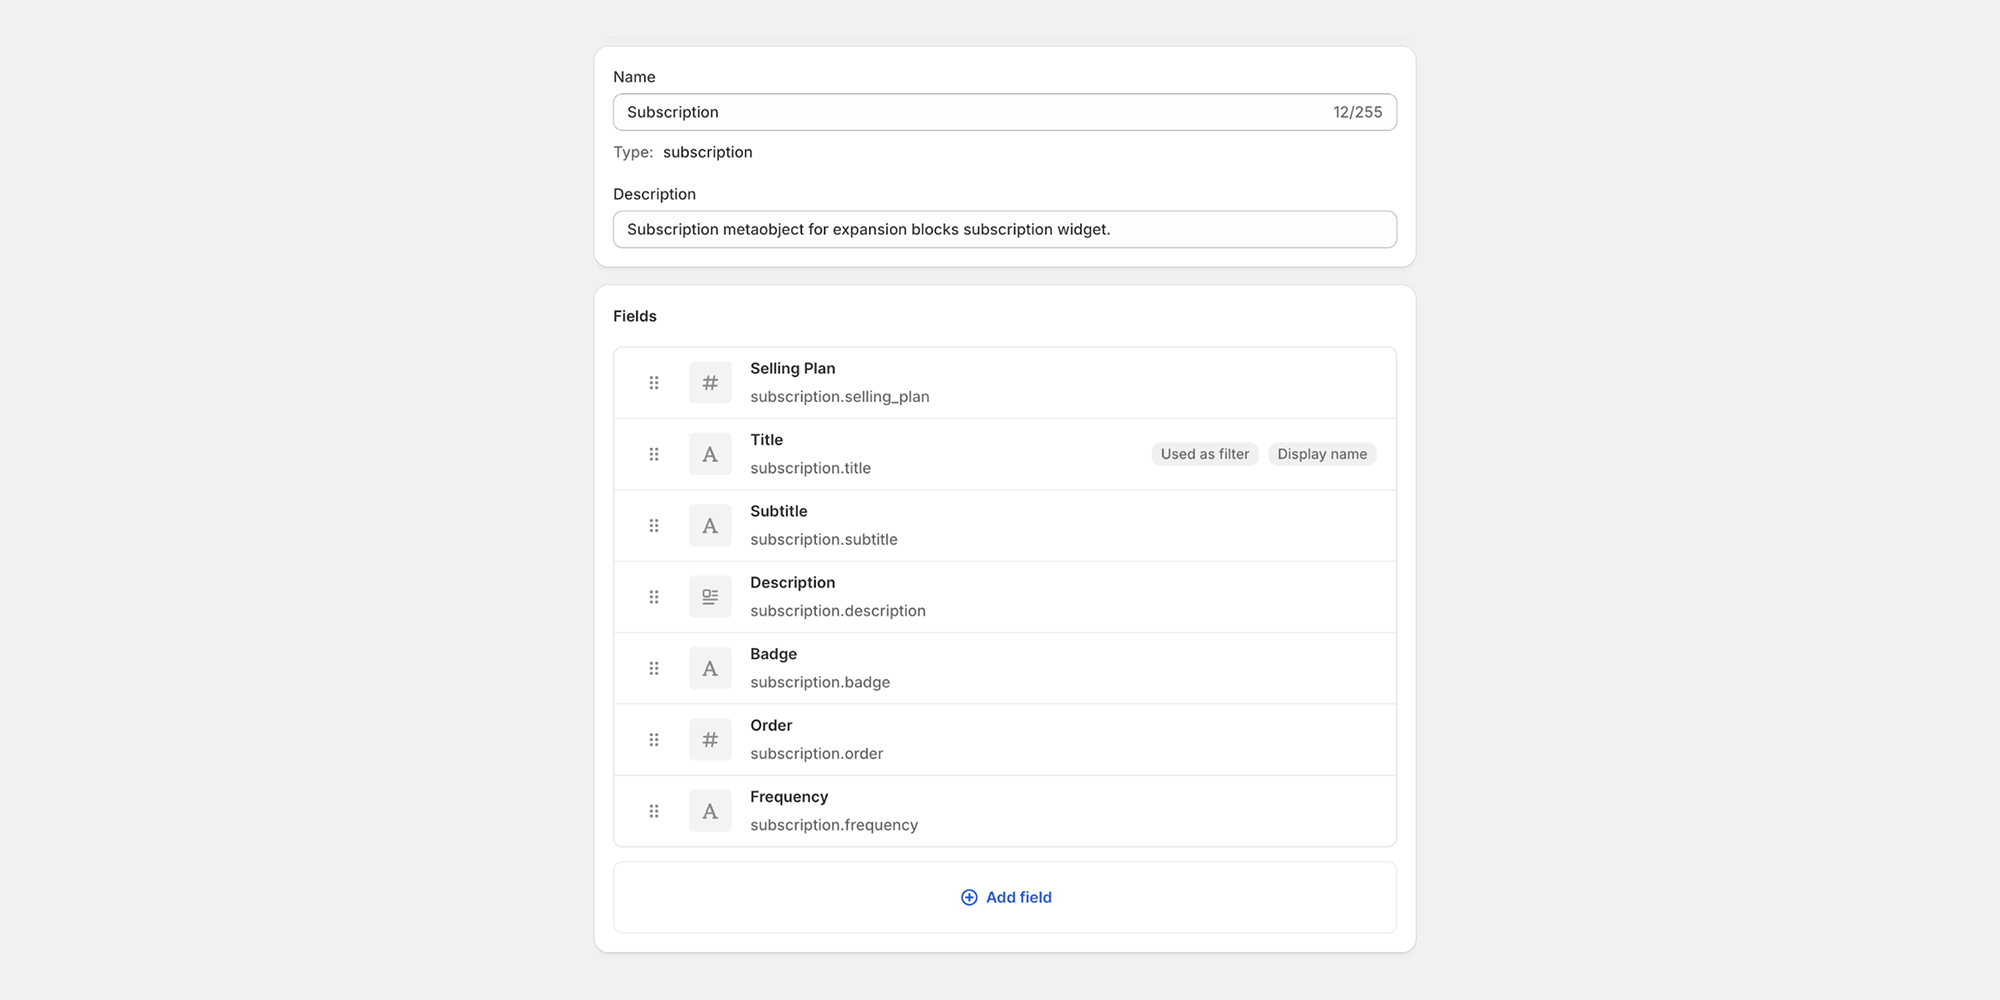
- Create a metaobject called Subscription, then start adding the fields below.
- Add an integer field called Selling Plan (subscription.selling_plan)
- Add a single line text field called Title (subscription.title)
- Add a single line text field called Subtitle (subscription.subtitle)
- Add a rich text field called Description (subscription.description)
- Add a single line text field called Badge (subscription.badge)
- Add an integer field called Order (subscription.order)
- Add a single line text field called Frequency (subscription.frequency)
Metafield Setup
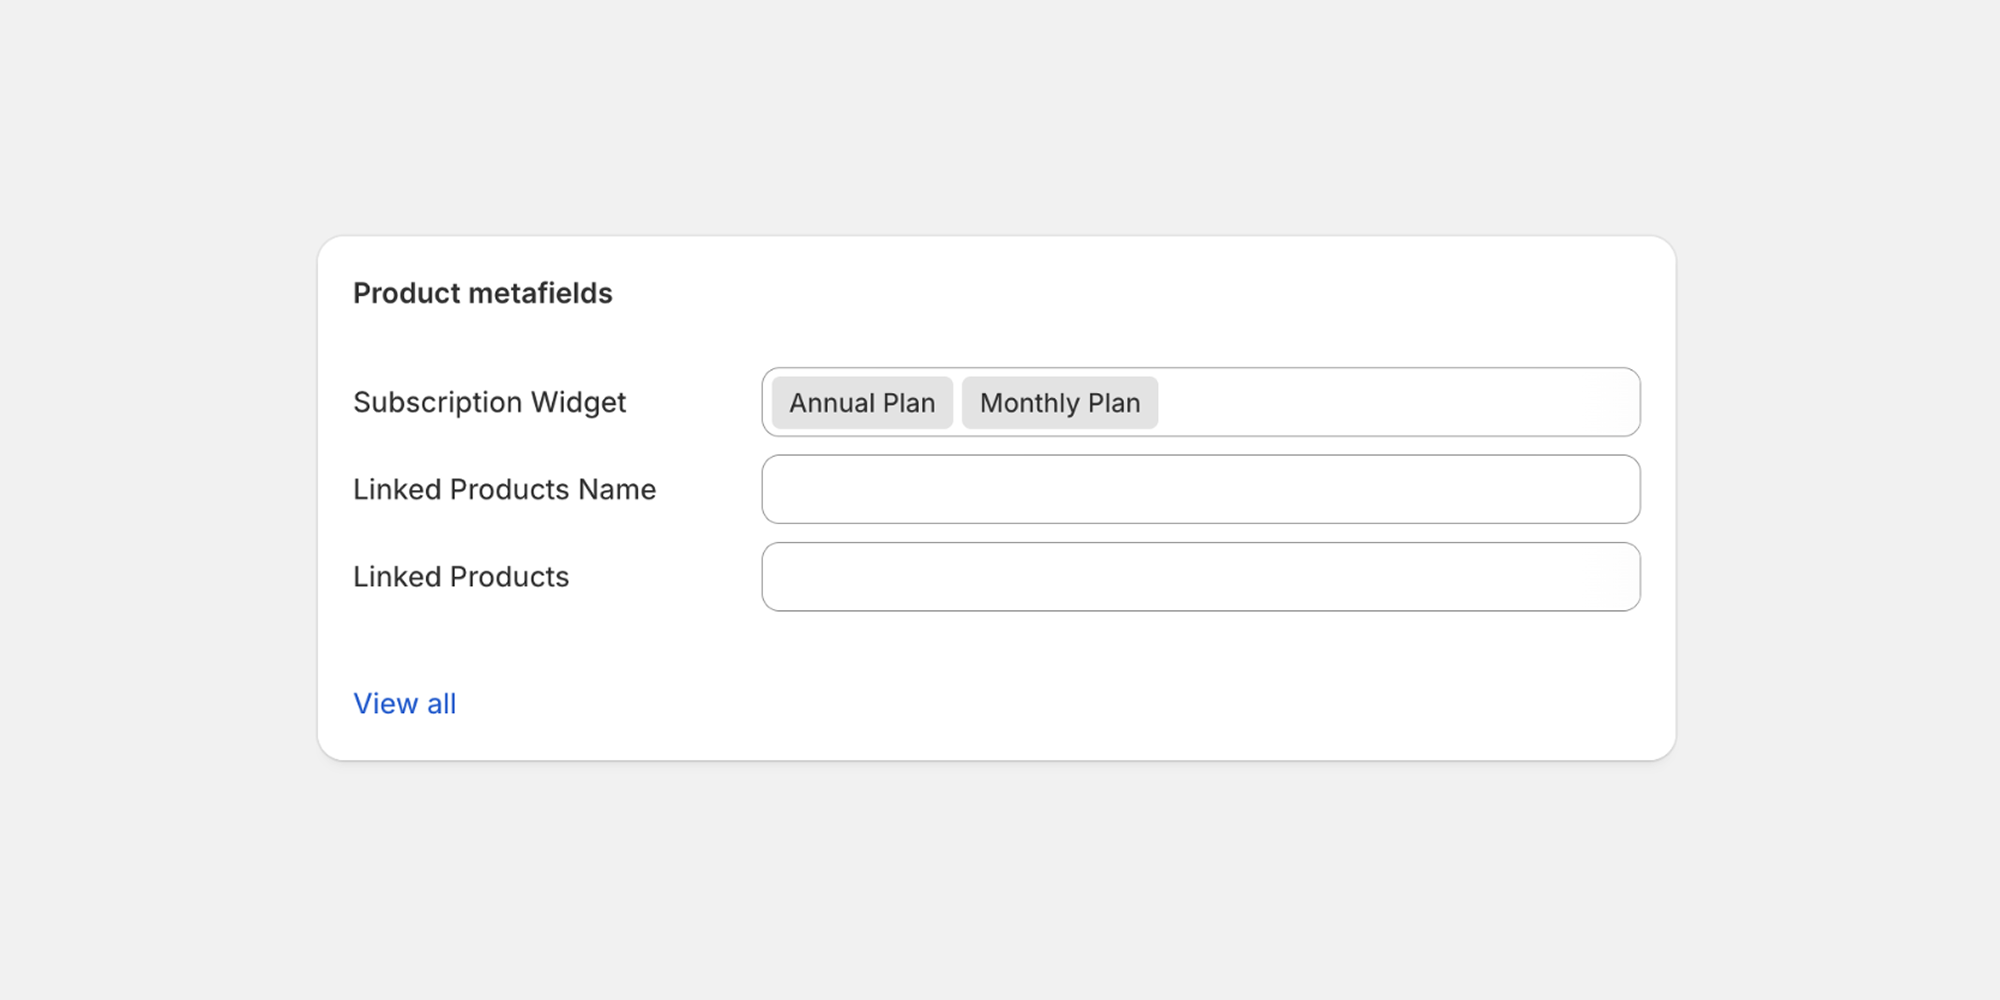
After a metaobject is created, it will need to be assigned to a product metafield.
Steps to configure the metafield:
- Create a product metafield called Subscription Widget (custom.subscription_widget)
- Assign the metaobject you recently created called “subscription”
- Add the “List of entries” option

Creating Metaobject Entries
After the metaobject is created, and assigned to a metafield, navigate over to the “Content” area in the left hand side of your Shopify admin and select Metaobjects. You’ll see your recently created metaobject, and you’ll be able to create an entry for each selling plan.
Navigate to metaobject entries page
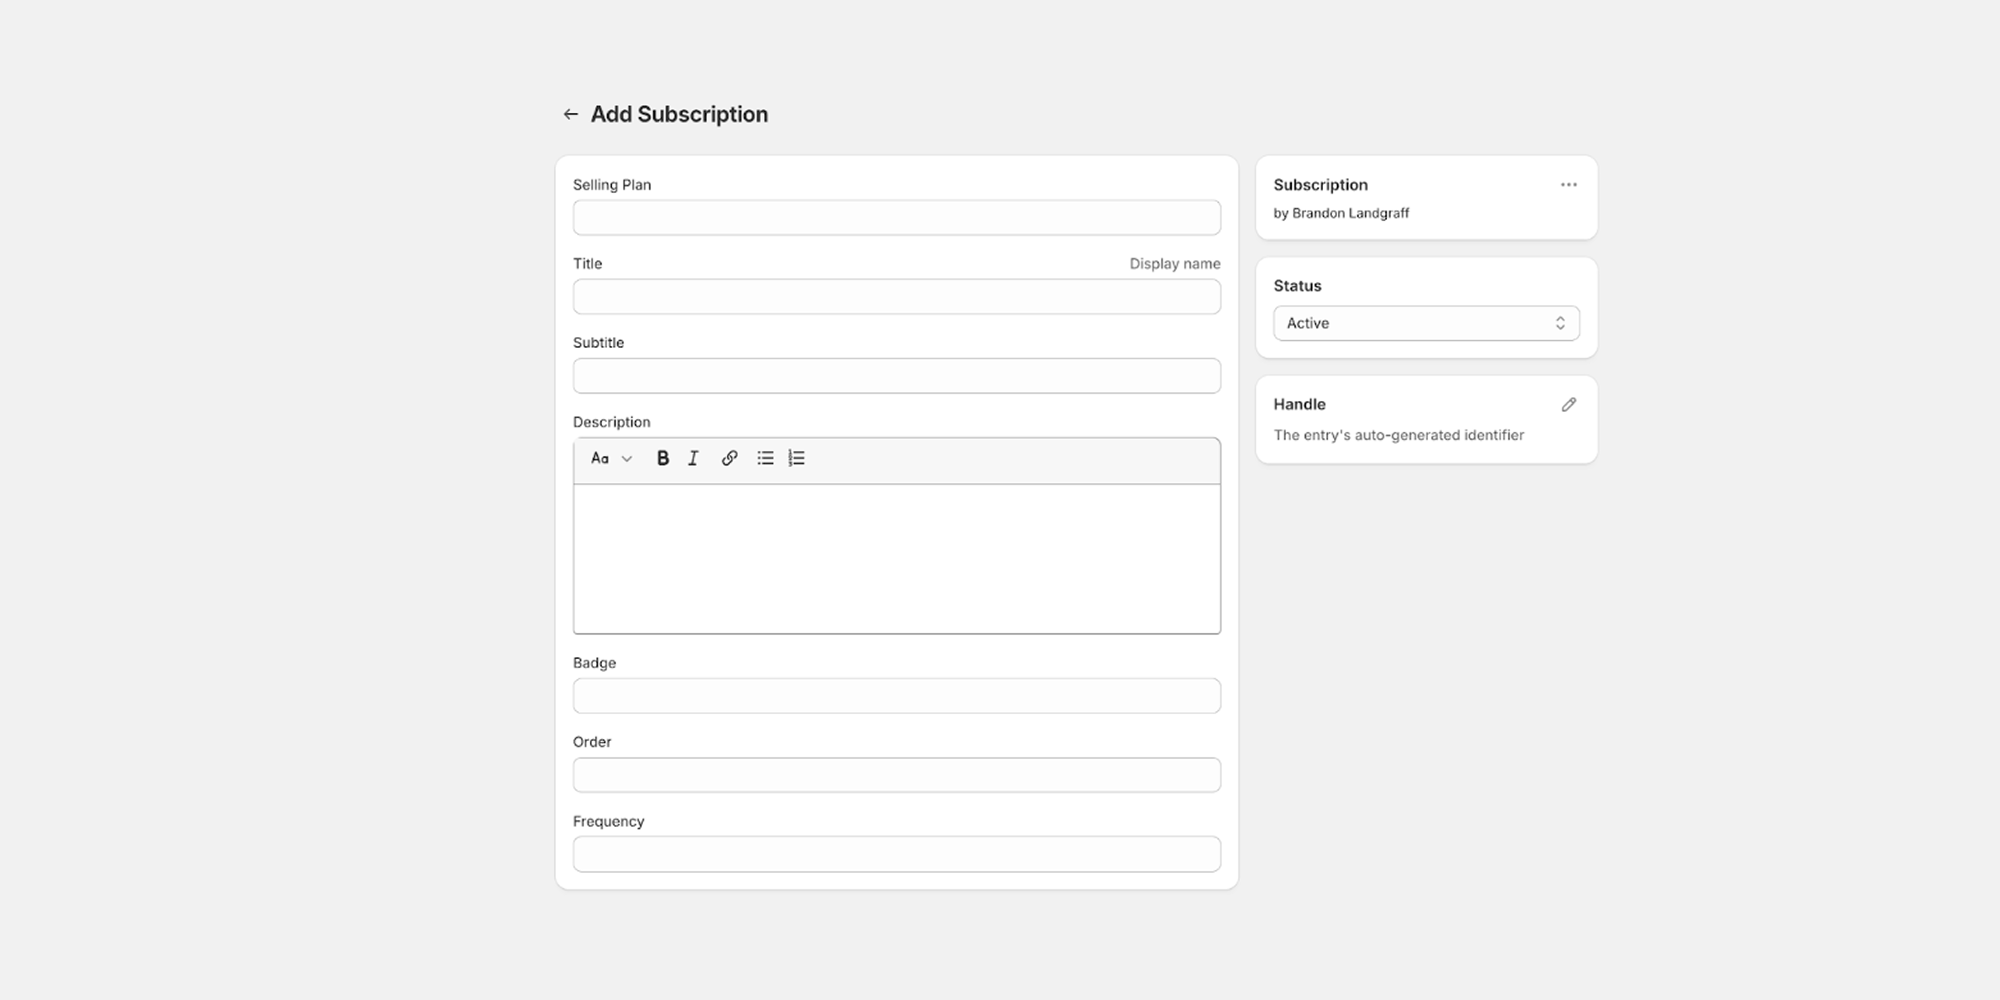
Add a new metaobject entry

Assigning Metaobject Entries
After the entries are created, navigate over to your subscription product metafield section. Add in each entry you’d like to display in the widget.
Required CSS Variables
The subscription widget is designed to inherit some of the global settings in Shopify’s Horizon theme. If you are using a different theme or have customized your Horizon theme, you may need to set some CSS variable values for the default installation to display correctly. Below is a list of CSS variables that you may need to define:
:root {
    --color-variant-text
    --color-variant-background
    --color-variant-border

    --color-selected-variant-text
    --color-selected-variant-background
    --color-selected-variant-border

    --variant-picker-button-border-width
    --variant-picker-button-radius

   font-family: var(--font-paragraph--family);
   font-style: var(--font-paragraph--style);
   font-weight: var(--font-paragraph--weight);
   font-size: var(--font-paragraph--size);
   line-height: var(--font-paragraph--line-height);

   --font-size--2xs: 0.625rem;
   --font-size--xs: 0.8125rem;
   --font-size--sm: 0.875rem;
   --font-size--md: 1rem;
   --font-size--lg: 1.125rem;
   --font-size--xl: 1.25rem;
   --font-size--2xl: 1.5rem;
   --font-size--3xl: 2rem;
   --font-size--4xl: 2.5rem;
   --font-size--5xl: 3rem;
   --font-size--6xl: 3.5rem;
}